-


-


-
 ALL CATEGORIES
-
-
-
-
-
-
SLEW SYSTEM
-
-
-
-
-
AXLES
- TIE RODS
- KIT SPIDER FOR DRIVE SHAFTS
- DIFFERENTIAL
- MOUNT THE KNUCKLE
- KIT SPIDER FOR AXLE SHAFTS
- HUB / GEAR REDUCTION
- PROPSHAFTS
- SOLENOID VALVES / COILS
- FLANGES / COUPLING YOKES
- BEARINGS
- BUSHES / WASHERS MOUNT AXLE
- AXLE / DIFFERENTIAL HOUSING
- DRIVESHAFTS / CENTER JOINTS
- BOLTS / NUTS / STRAPS
- LOCK / CIRCLIP / CLIP
- CROWN WHEEL AND PINIONS
- SEALS
- OTHERS
-
-
-
-
-
-
-
-
ENGINE
-
-
-
-
-
COILS / SOLENOID VALVES
-
SWIVELS / TURNING JOINTS
-
PUMPS / STEERING VALVES / MOTORS
-
-
-
VALVES
-
HYDRAULIC HOSES / PIPES
-
RAMS
-
ACCUMULATORS
-
QUICKHITCHES
-
-
-
BOLTS / NUTS / WASHERS
-
PUMP DRIVESHAFTS
-
SEALS VALVES / PUMPS
-
OTHERS
-
-
-
-
-
-
-
TIMING
-
EQUIPMENT
-
-
LUBRICATION SYSTEM
-
-
INDUCTION / EXHAUST SYSTEM
-
SEALS / GASKET SETS
-
ENGINE MOUNTING
-
SERVICE TOOLS
-
-
-
-
-
-
STABILIZERS
-
-
-
-
-
-
FUSES / FUSE BOXES
-
RELAYS / FLASHERS
-
REVERSE ALARM
-
-
HEATERS / BLOWERS
-
BATTERY ISOLATER SWITCH
-
-
-
-
-
OILS
-
FLUIDS
-
-
-
PAINTS
-
-
-
-
-
-
-
GLASS / CAB GLAZING
-
-
-
RUBBER SEALS - GLASS
-
ASSEMBLY KITS / ADHESIVES
-
-
-
-
-
ADAPTERS
-
BOLTS / LOCKS
-
-
-
-
HYDRAULIC INSTALLATIONS
-
TOEPLATES
-
TOOTH RIPPER
-
-
-
HYDRAULIC HAMMERS / TOOLS
-
PLOWS
-
QUICKHITCHES
-
FORKS
-
-
-
EARTH DRILL / AUGER
-
SWEEPER / COMPONENTS
-
SWINGOTILT / PLATFORMS
-
-
-
-
-
ACCESSORIES
-
DECAL / STICKERS
-
-
-
GADGETS
-
CLOTHES
-
FAN ZONE
-
-
-
 BODYWORK
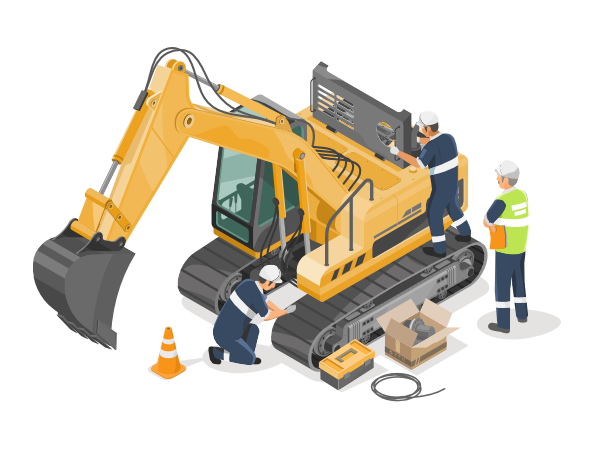
 UNDERCARRIAGE
 TRANSMISSION / AXLES / WHEELS
 STEERING / CONTROL
 HYDRAULICS
 BRAKES
 ENGINE
 ARMS / SWING / STABILIZERS
 ELECTRICS
 OILS / FLUIDS / LUBRICANTS / PAINTS
 FILTERS
 GLASS / CAB GLAZING
 TEETH / ADAPTORS / PIN LOCKS
 ATTACHMENTS
 ACCESSORIES / TOOLS



How to Replace a Mini Excavator Track – A Step-by-Step Guide
How to Replace a Mini Excavator Track – A Step-by-Step Guide
Can You Do It Yourself? Yes!
Replacing a worn or broken rubber track on a mini excavator is one of those repairs that seems complicated and requires a service visit at first glance. In reality, with a bit of strength, the right tools, and adherence to safety rules, it's a task you can perform yourself. Our guide will walk you through the entire process step by step.
Preparation and Safety – Your Priority
Before you begin, make sure you have everything you need and are working safely.
Required Tools:
- A socket wrench set (usually a 17-24 mm socket for the tensioner valve).
- Two sturdy pry bars or tire irons.
- A grease gun with the appropriate grease.
- Work gloves and safety glasses.
- A second person to help – invaluable when installing the new track!
IMPORTANT SAFETY RULES
Work on a level, stable surface. Never place any part of your body under a machine supported only by its own hydraulics. Be extremely careful when loosening the tensioner – the grease is under immense pressure!
Step-by-Step: Removing the Old Track
- Lift the Machine: Use the dozer blade and the boom with the bucket to stably support the machine and lift one side of the undercarriage into the air. Ensure the track can rotate freely.
- Loosen the Track: Locate the small inspection cover on the undercarriage frame. Behind it, you will find a grease nipple and the tensioner valve. Using a wrench, VERY SLOWLY AND CAREFULLY loosen the valve. You will see grease begin to seep out, and the idler wheel will retract towards the frame. Loosen it enough for the track to become very slack.
- Remove the Track: Start from the idler wheel (front). Use a pry bar to lift and slide the edge of the track off the wheel. Then, with a helper who slowly rotates the track using the travel lever, continue to slide it off the rollers and finally off the sprocket.
Undercarriage Inspection – The Perfect Moment!
With the track off, you have a perfect opportunity to inspect the rest of the undercarriage. Check:
- Track and Carrier Rollers: Look for play in the bearings, oil leaks, and flat spots.
- Idler Wheel: Check the running surface and bearing play.
- Sprocket: Check if the teeth are sharp or "hooked" like a shark's fin. A worn sprocket will quickly destroy a new track!
- Travel Motor (Final Drive): Look for any oil leaks.
Remember that worn components drastically shorten the life of a new track. It's worth investing in proven parts, such as components from the KERTRACK brand.
Step-by-Step: Installing the New Track
- Lay out the new track: Unroll the track on the ground in front of the undercarriage, ensuring the tread pattern is facing the correct direction.
- Fit the track onto the sprocket: This is the most important step. With a helper, lift the track and engage its links with the teeth of the sprocket (rear wheel). Make sure it is well-seated.
- Pull the track onto the rest of the undercarriage: Drape the top part of the track over the carrier rollers and the idler. Now for the hardest part: using a pry bar as a lever and with your helper very slowly rotating the track, "walk" its bottom edge onto the idler and the bottom rollers.
- Tension the track: Tighten the tensioner valve. Connect the grease gun to the grease nipple and pump in grease. Watch as the idler wheel extends, tensioning the track. Tension it until you achieve the correct sag (as described in our previous guide!).
Track replaced, but the undercarriage needs more repairs?
If you noticed worn rollers, sprockets, or a final drive leak during your inspection, now is the perfect time for a comprehensive repair. We can help you select all the necessary components – from high-quality undercarriage parts from KERTRACK to reliable travel motors from TRK TRACK SOLUTIONS. Contact us to get your machine back in full working order!
Related posts
 Doosan — excavators, loaders, ADTs: history, models, spare parts
Doosan — brand history, DX/DL/DA families, extended model list and spare parts offer. VIN-based matching. Call: +48...
Read more
 Ecomat — compact skid steers & articulated loaders: history, models, spare parts
Ecomat — Italian compact loaders. Brand story, ES/ET/EL series, popular models and our spare parts offer. VIN/model...
Read more
 Eurocomach — mini/midi excavators & compact track loaders: history, models, spare parts
Eurocomach — Italian mini/midi excavators and compact track loaders. Explore brand history, popular ZT/TR/UR models...
Read more
 Hanix — mini excavators: history, models, spare parts
Hanix (Nagano) — early pioneer of mini excavators in Europe. See brand history, H/N model list and fast VIN/SN parts...
Read more
 Sany — excavators, cranes & concrete equipment: history, models, spare parts
Sany — a global heavyweight from China. Explore brand history, key models (SY215C/SY365C) and our premium spare...
Read more
WE OFFER PRODUCTS OF THE BEST BRANDS



















SERWIS KOP Sp. z o.o. Sp.k.
ul. Podkarpacka 57A, 35-082 Rzeszów
NIP: 813-352-97-49 REGON: 180286726
Opening hours
Telephone support - Monday - Friday (8:00 AM – 5:00 PM)
Order pick-up - Monday - Friday (8:00 AM – 4:30 PM)
Email
[email protected]
[email protected]
Gadu-Gadu communicator
GG: 4185846 - Daniel
ul. Podkarpacka 57A, 35-082 Rzeszów
NIP: 813-352-97-49 REGON: 180286726
Opening hours
Telephone support - Monday - Friday (8:00 AM – 5:00 PM)
Order pick-up - Monday - Friday (8:00 AM – 4:30 PM)
[email protected]
[email protected]
Gadu-Gadu communicator
GG: 4185846 - Daniel
Phone
+48 17 864 31 00
+48 17 864 00 24
+48 17 864 25 96
Mobile phone
+48 607-700-547
+48 695-944-818
+48 691-330-531
+48 690-906-751
Fax
+48 17 864 31 20
+48 17 864 31 00
+48 17 864 00 24
+48 17 864 25 96
Mobile phone
+48 607-700-547
+48 695-944-818
+48 691-330-531
+48 690-906-751
Fax
+48 17 864 31 20